

Bad bundles have been a cause of pain and frustration for courts and advocates for many years; see e.g. Sedley’s Laws of Documents. But technology provides new and creative ways to turn a simple set of documents into an instrument of torture for all concerned. The bundle in Allison Bailey’s employment tribunal sounds to have been a masterpiece of the genre (with thanks to Tribunal Tweets) :
Bundling is an awkward task. It’s drudgery, so it’s tempting (and often unavoidable, for reasons of cost) to delegate it to someone very junior. But it’s tricky drudgery involving lots of little decisions that are hard to get right if you’re not an experienced litigator. No wonder it often goes badly wrong.
This is a blog about how to make the perfect hearing bundle, and how to make the process of making it relatively painless. (It’s not intended for lawyers involved in big-ticket commercial litigation: they will have fancy and eye-wateringly expensive document management software, and they are big enough and ugly enough to look after themselves.)
The key insight here is that preparation of the bundle begins months – possibly years – before the hearing.
It goes like this.
1. Create a folder on your computer. Call it “draft bundle”.
2. Every time you generate or receive a document that may ultimately need to end up in the bundle, do the following:
(i) save it as a PDF if that’s not the form in which you have it already;
(ii) check that it it is fully searchable, and if not, OCR it – you can do this in Adobe Pro from “Scan & OCR” on the Tools menu or in PDF Expert from the “Scan & OCR” tab at the top of the page;
(iii) give it a name (see step 3), and put it in your “draft bundle” folder.
(Try to get disclosure from the other side in the form of a file of separate documents, preferably in their native file formats. Metadata is part of a document, and disclosable as a matter of course – and may be interesting in its own right – so you’re entitled to this. Turn each document into a PDF before saving in your draft bundle folder, saving copies of the original documents elsewhere. If some of the disclosure arrives in the form of PDFs containing a number of documents, split them up into separate documents first. You can do this quite fast by inserting bookmarks in Adobe Acrobat, and then splitting the document by bookmarks. Use the file name convention at point 3 below for your bookmarks, and Adobe will use the same bookmark names to name the individual files.)
3. Give each document a name. If it’s a document whose date is or may be part of the “story” of your case, prefix its name with its date in reverse order. So if it’s an email from Angus Beattie to Cordelia Diamond sent on 14 April 2020, you might call it 2020.04.14 AB-CD. The point of this is to force Finder or File Explorer to sort your dated documents in date order. If there’s a section of the chronology where it may matter in what order things happened on the same day, you can put the time as well, to force sorting in order within a particular date: 2020.04.14.09.33 or 2020.04.14.09.33.
(I like very spare indexes, so if I’m in charge of the bundle, emails will have names as short as 2020.04.14 AB-CD. But you could make the names a little more informative by adding the subject-line, e.g. 2020.04.14 AB-CD FW: Re: Grievance meeting. But whatever you do, don’t attempt a description of the document that is anything other than its name or its subject-line – if you do, you’ll get into endless tussles with the other party about whether your names are tendentious.)
You may have a few documents that are part of the chronological story, but which are undated. In those cases, I’d suggest making a guess at the most likely date and saving with a filename that indicates your estimated date, and the fact that it’s a guess. So maybe something like “2021.01.04 EF -GH est. date”.
4. Email chains are a bit of a pain. Divide them up and reduce duplication as much as you reasonably can, and label each short chain with the date of the message at the top, but don’t stress unduly. Everyone’s used by now to reading email correspondence in a slightly back-and-forth way.
5. For other documents, choose some naming convention that works for you – it’s less critical. You might prefix the pleadings, tribunal orders etc that you’re going to want at the beginning of the bundle “000”, things like policy documents and procedures “POL”, anything you’re not yet sure to do with “Q”, and so on.
6. Carry on doing this through the life of the case – do it with the documents your client gives you, the pleadings, orders from the court or tribunal, everything you get from the other side on disclosure. You’ll need to be quite disciplined, but your future self will be grateful.
7. When your collection is complete and you’ve fiddled with file prefixes so that the documents are in the order you want, deleted duplicates, moved irrelevant documents out etc, merge all the files in Adobe Acrobat. You’ll find Acrobat has used your filenames as bookmarks. (I expect there are other programs that will do this, too, though so far as I have been able to discover, PDF Expert doesn’t. I prefer PDF Expert for most purposes, so I just switch between the two.)
8. Next, to make your index, you need a text list of the files in your draft bundle folder. In Finder, open your draft bundle folder, highlight the top file and then using the shift key highlight the bottom file – this should highlight all files in the folder in blue. Then press Command+C (or in Windows, ctrl+C) to copy them.
9. Launch a text editor – e.g. TextEdit on a Mac, or Notepad if you’re in Windows – and make sure that you have “plain text” chosen – in TextEdit, that’s in the “Format” menu. Paste the file list from your clipboard: on a Mac, command+V. (Or you can skip the step about choosing “plain text” if you know how to paste in plain text – shift+option+command+V on a Mac.)
10. Copy your file list into a Word document and edit to remove all the “.pdf” suffixes. You can do this easily with search and replace, replacing “.pdf” with a space. This is the guts of your index.
11. Format your index, save it as a PDF, and stick it onto the front of your merged bundle.
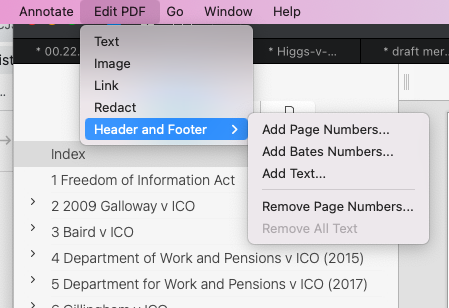
12. Open your merged bundle in your preferred PDF viewer and add page numbers. Ideally, number the index pages in lower case Roman numerals, and start pagination proper on the first page of documents.
If your preferred PDF viewer is PDF Expert, you choose “Add Page Numbers” here:
13. Add the page numbers to your index. I think this is the bit you’ll have to do manually – but it’s just a matter of skipping through your bundle bookmark by bookmark and writing in the page number for the start of each document, so it’s not too terrible even for a large bundle. And it’s easy and requires no decision-making, so you can safely give it to someone very junior so long as you trust them to take care to do it accurately. (If you have Bundledocs – and probably other programs like it – it will do this bit for you.)
14. Turn your index page into a PDF, and add it to the front of your bundle.
15. Tweak page labels on your PDF so that the electronic page numbers align with your pagination. (You can do this in Adobe Pro from the “Organise Pages” menu under “Tools”.)
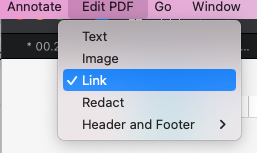
16. Add hyperlinks from the index through to the first page of each document. (Again, I think Bundledocs will do this for you, if you have it.) This is fiddly but easy, too. In PDF Expert, it’s here:
17. That’s it. Congratulations, you have made a perfect bundle. It was actually 17 steps, but apparently for clickbait reasons 10 is a better number, so I lied. Sorry.
This method has the following advantages, over and above the perfection of the end result:
- Front-loading the fiddly stuff. Putting together a bundle from scratch a few weeks before the hearing is time-critical anxiety nightmare. The fiddly stuff can’t be avoided entirely: giving every damn document in the bundle a backwards-date-format filename is undoubtedly fiddly. But it’s fiddling that can be done a bit at a time over a long period.
- The final stages are pretty easy, so adjusting your bundle at a late stage isn’t very painful.
- Your draft bundle folder will be a useful reference source as the case progresses.
- You can annotate and highlight the documents in your draft bundle folder freely, because it’s easy to strip annotations from the bundle once compiled but before sharing with the other side.
- This means you can share your draft bundle folder with counsel, and she can start marking it up. So if agreeing the bundle with the other side proves fraught, your barrister isn’t jumping up and down with impatience and hassling you while you’re trying to deal with that – instead she’s serenely marking up documents and preparing cross-examination notes, secure in the knowledge that all her markings will appear in the finalised version of the bundle when it reaches her.
Post-script
It has been objected that if the barrister has access to the draft bundle folder and starts marking it up, the solicitor can see her work in real-time. I’m not sure how real a problem that is (I suspect most solicitors will have better things to do than monitor counsel’s preparation in this way) – but I can see that it could give you an uneasy sense of being under detailed surveillance, at least potentially.
Fortunately, there’s an easy answer. Get your solicitor to share the draft bundle with you. When you get to the point where you’d otherwise be screaming for a finalised bundle to start work, make a private copy, and start marking that up. Get your solicitor to tell you when they’ve agreed the contents of the bundle and are about to compile it – and at that point, if you want to, you can copy all your marked-up documents back into the shared folder. Choose “replace”, and your marked-up copies will replace their unmarked twins – but the folder will still contain any documents that have been added since you made your copy.